Bootloader通过USB更新Pixhawk V6X-RT
本主题向flash解释 Pixhawk FMUv6X-RT bootloader via USB without needing a debug probe.
综述
_PX4 Bootloader_用于加载固件 Pixhawk boards (PX4FMU, PX4IO).
Pixhawk控制器通常预安装了适当的引导程序。 然而,在某些情况下,它可能不存在,或者可能存在需要更新的旧版本。 也有可能设备被封死,因此必须擦除设备并刷新新的引导加载程序。
大多数飞行控制器都需要一个调试探测器来更新引导加载程序,如中所述 Bootloader Update > Debug Probe Bootloader Update. 您可以将此方法用于Pixhawk FMUv6X RT,但如果您没有调试探针,则可以使用本主题中概述的说明。
构建PX4 FMUv6X RT引导加载程序
这可以使用PX4 Autopilot文件夹中的 make 命令和特定于董事会的目标 _bootloader suffix. For FMUv6X-RT the command is:
make px4_fmu-v6xrt_bootloader这将构建引导加载程序二进制文件,如下所示 build/px4_fmu-v6xrt_bootloader/px4_fmu-v6xrt_bootloader.bin, which can be flashed via SWD or ISP. 如果你正准备构建 bootloader,你应该已经熟悉这些选项之一。
如果需要 HEX 文件而不是 ELF 文件,请使用 objcopy 参数:
arm-none-eabi-objcopy -O ihex build/px4_fmu-v6xrt_bootloader/px4_fmu-v6xrt_bootloader.elf px4_fmu-v6xrt_bootloader.hex通过USB闪烁引导加载程序
Pixhawk V6X-RT配备了位于ROM上的内置引导加载程序。 要通过USB闪存新的引导加载程序,您必须下载 NXP MCUXpresso Secure Provisioning tool. 该工具适用于Windows、Linux和macOS。
安装_MCUXpresso Secure Provisioning_应用程序并启动该应用程序:

首次启动时,您必须创建一个“新工作区”。 Select
i.mX RT11xxand then selectMIMXRT1176
创建“新工作区”后,单击 FlexSPI NOR - simplified button
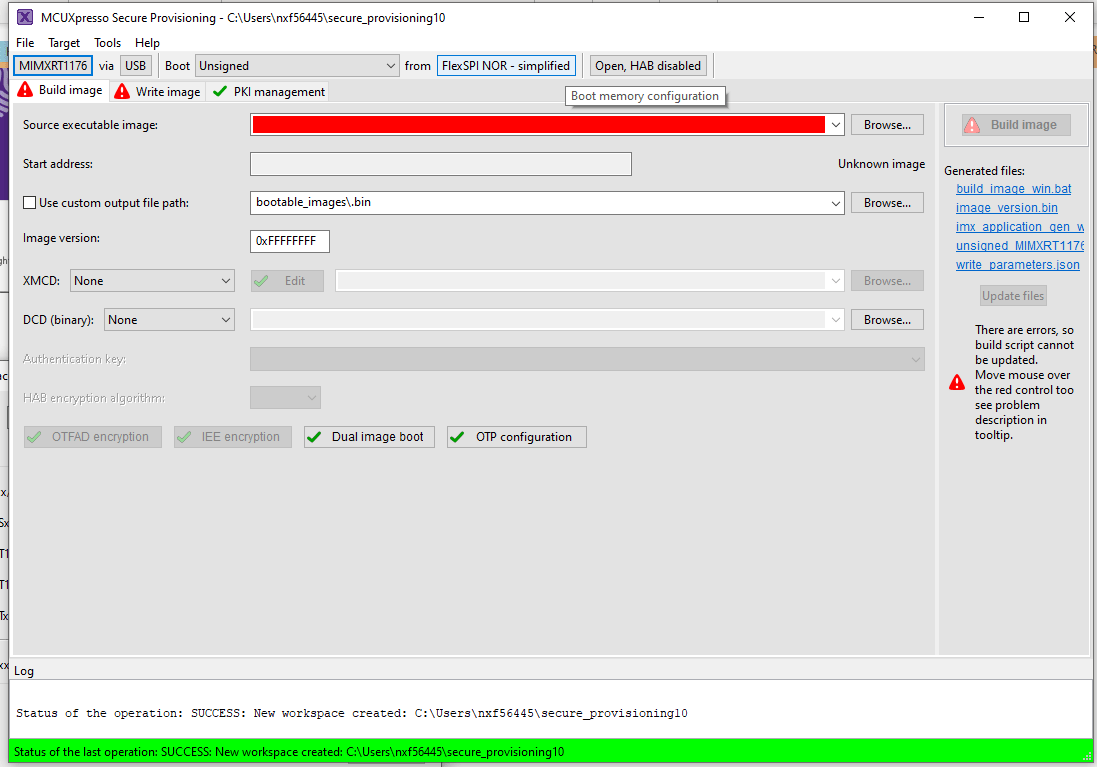
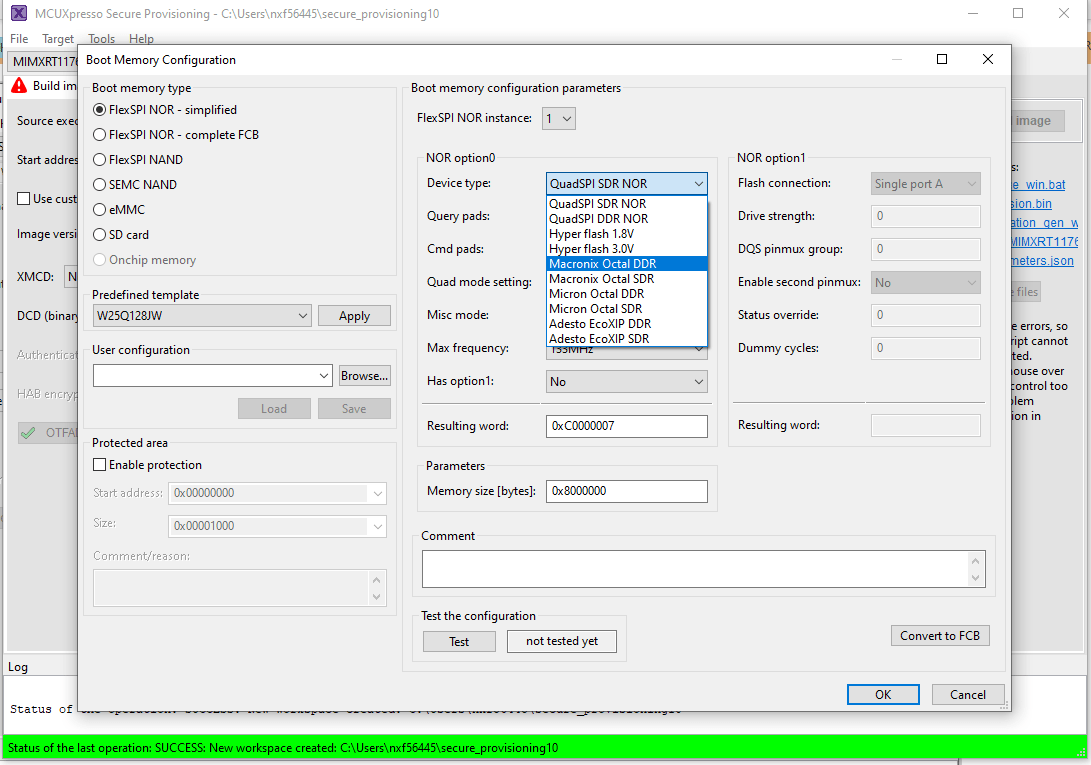
在_Boot Memory Configuration_窗口中,将“设备类型”更改为
Macronix Octal DDRand press OK.
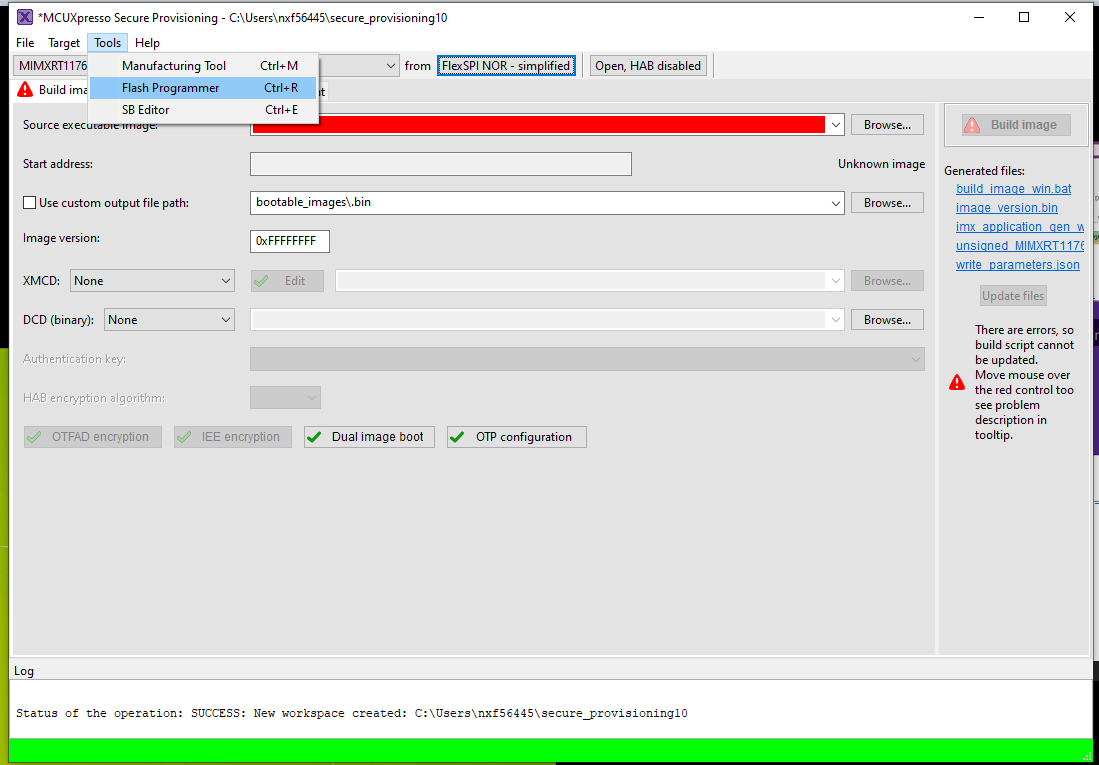
在菜单栏上选择 Tools > Flash Programmer:
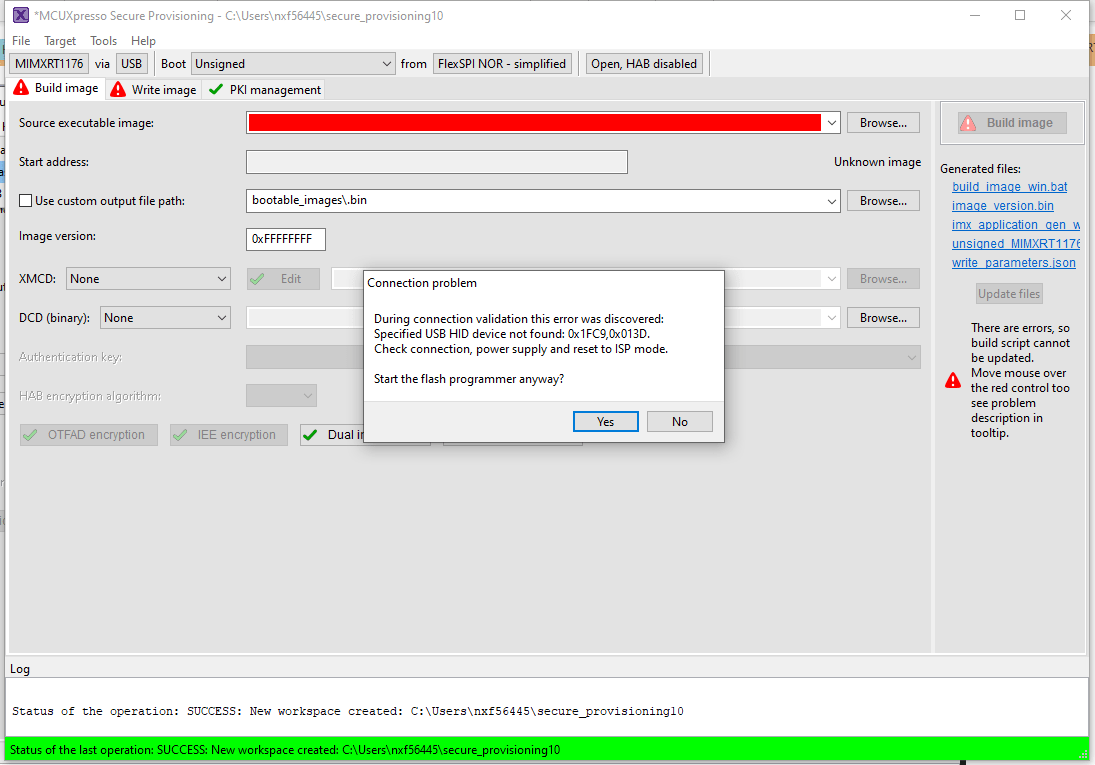
您应该看到此弹出窗口,指示Pixhawk V6X-RT未处于“ISP引导加载程序模式”。
要使Pixhawk V6X-RT进入“ISP引导加载程序模式”,有2个选项:
Launch QGC connect the Pixhawk select Analayze Tools and then MAVLINK Console. On the console type
reboot -i. This will put the Pixhawk V6X-RT into "ISP bootloader mode"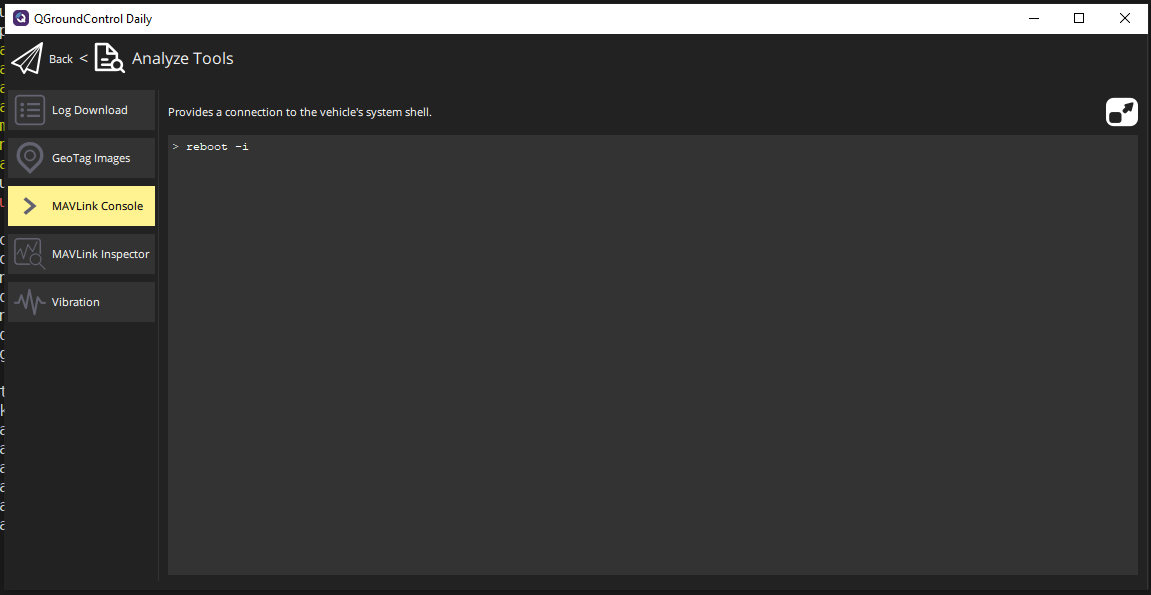
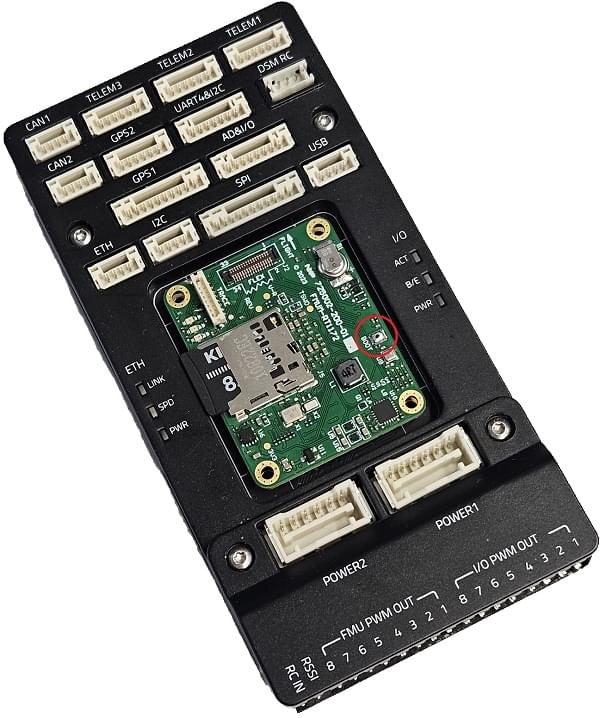
如果电路板是砖砌的,无法连接到QGC,则您在给电路板通电的同时打开FMUM模块并按下BOOT按钮(下图中红色圆圈)。
Press YES to launch the Flash Programmer Tool.
当Flash编程开始时,您会看到一个弹出窗口,用于配置目标内存按键 Yes

当目标内存配置成功时,您可以按 Erase All button

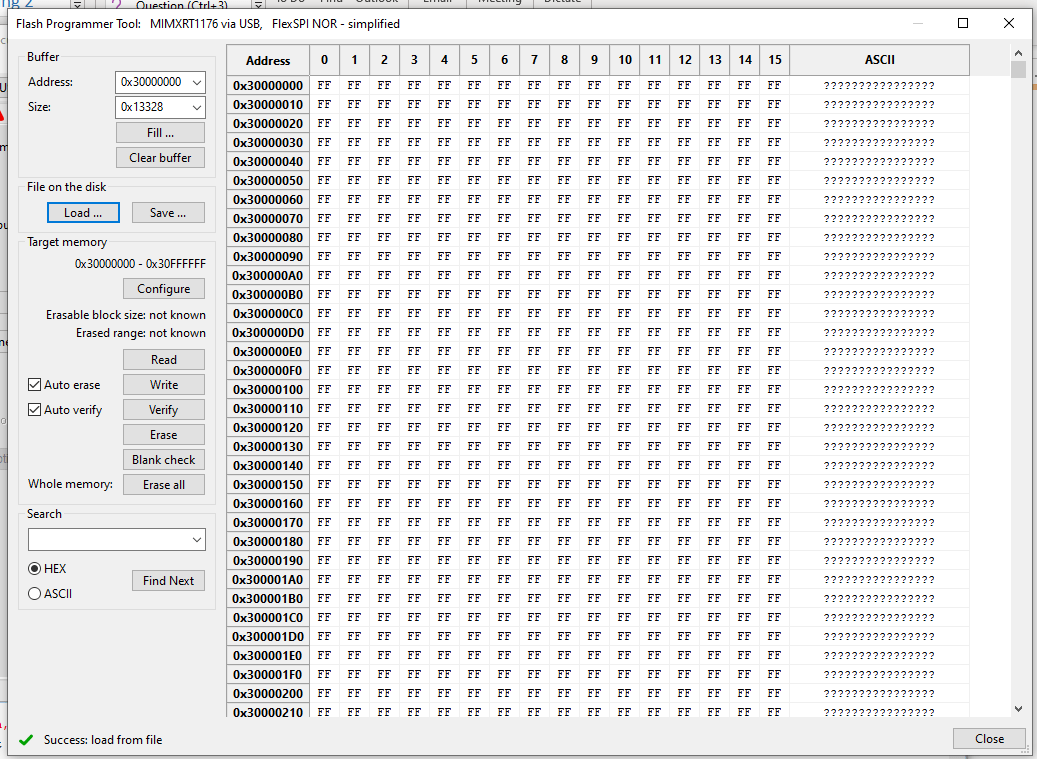
擦除闪光灯后,按 Load ... button and then press the Browse button
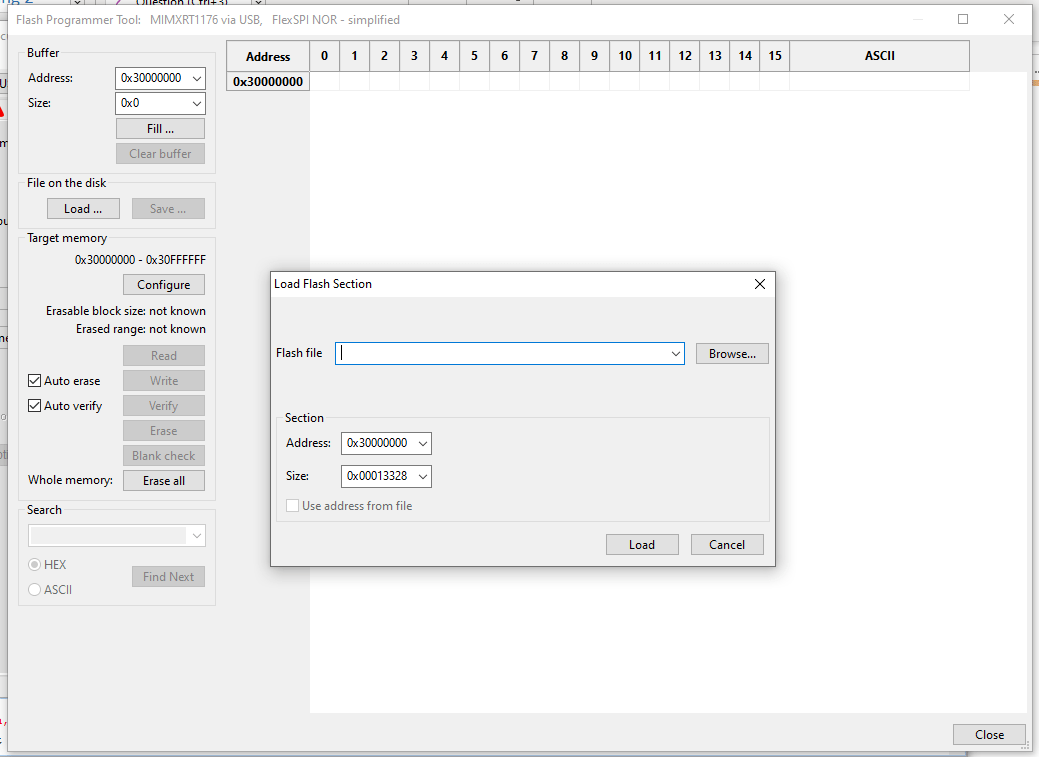
Locate the
px4_fmu-v6xrt_bootloader.binfile and press Open and then press on Load.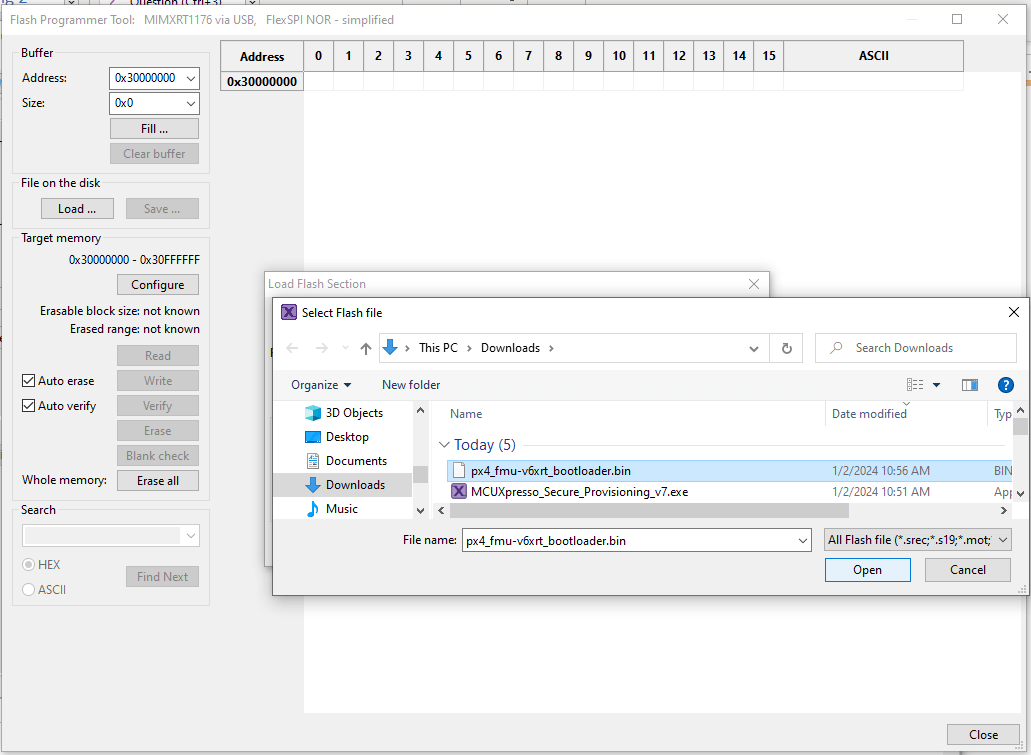
如果加载成功,您应该在右下角看到“成功:从文件加载”
Press the Write button to flash the PX4 bootloader
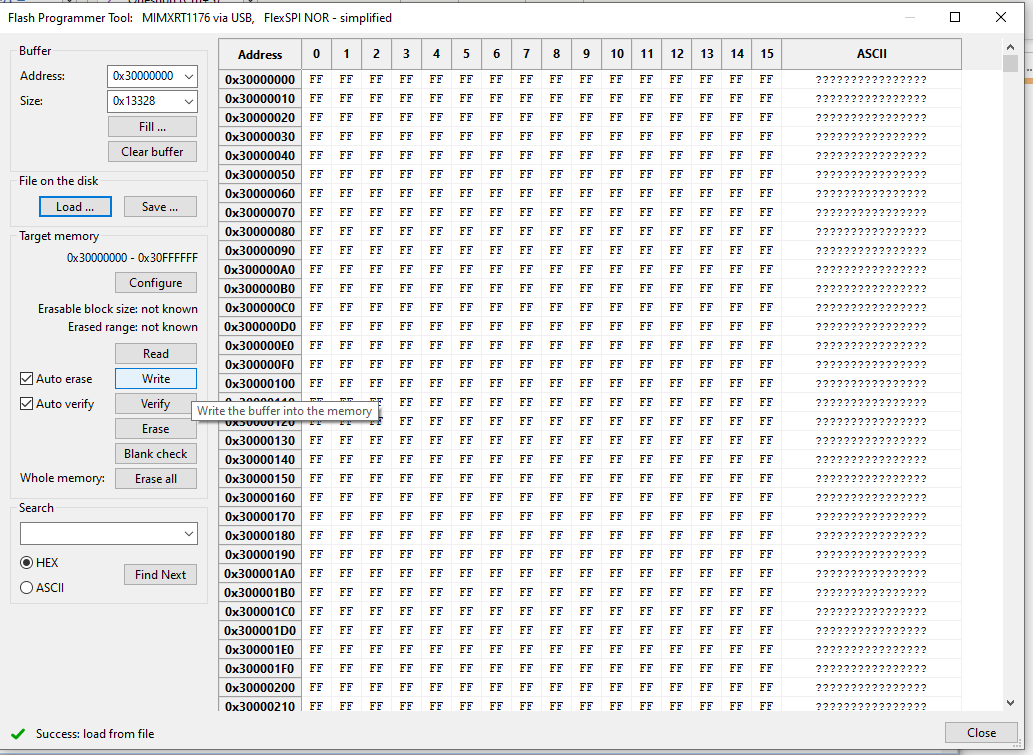
成功应该表现出来 "Success: Write memory 0x30000000 - 0x3XXXXXXX" Note: values might differ due to bootloader changes.

现在拔下Pixhawk V6X-RT并重新给电路板供电。 更新引导加载程序后,您可以 Load PX4 Firmware using QGroundControl.